How knitted cables are made
Knitted stitches are arranged in a grid. Horizontal lines of stitches are called rows (or rounds if you're knitting in the round). We talk about rows quite often, because that's how we knit: horizontally. But the stitches are also stacked in vertical columns. By manipulating these columns, we can make textures that look twisted, cabled and braided.
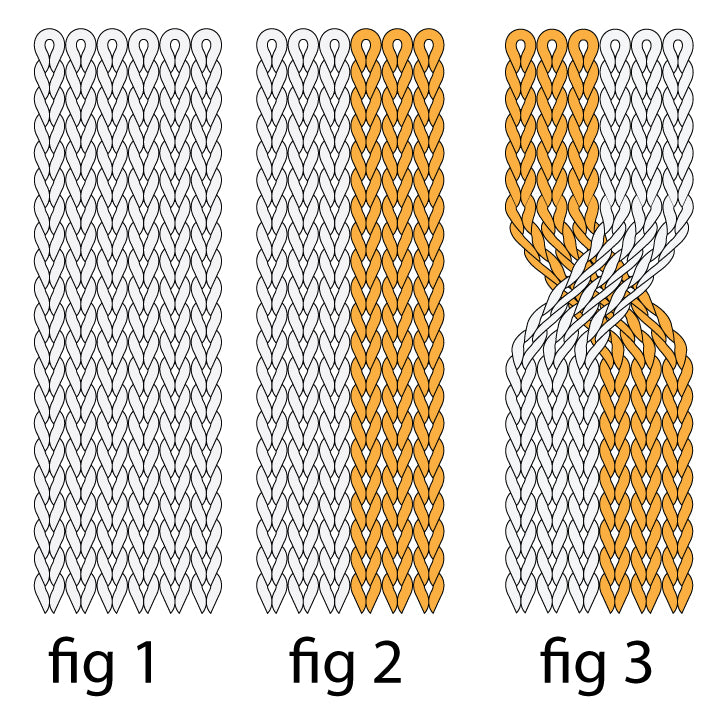
Fig 1 is an illustration of what I mean by a column of stitches, 6 stitches wide.
Now, let's say we wanted to twist this column to make a knitted cable. Mentally divide the column in to two columns, each 3 stitches wide (Fig 2).
To knit a cable, all we do is swap the position of the two 3-stitch columns (Fig 3). If you're new to cables, don't worry about how we do it yet.

If we repeat this twist, we get a knitted cable (Fig 4). That twist, by the way, is called a Cable 6 Back (C6B), because you work it over 6 stitches and the first 3-stitch column goes to the back.
And of course, you could swap them the other way, with the rightmost column going to the front (Fig 5). And you got it, this is called a Cable 6 Front (C6F).
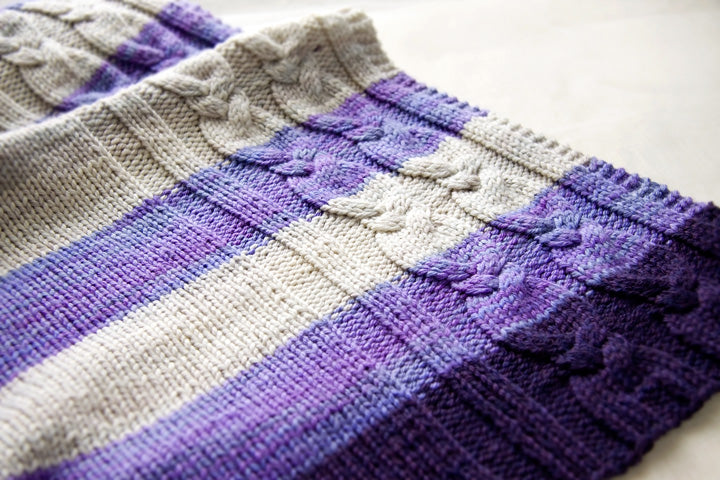
The knitted cable stitch in the Cabled Blanket Pattern is one of my favourites; widely spaced braided cables. It might look complicated, but actually it's just a knitter's trick of careful placement of twists, staggered at intervals over a column of 9 stitches (think of it as three columns of 3 stitches). Fig 6 is a simplified illustration of the twists in a braided cable.
So let's take a look at knitting cables in action. Here's how to work the Cable-6-Back (C6B) on rows 7 and 11 of the Cabled Blanket.
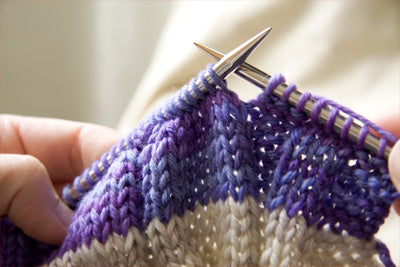 Work up to the beginning of the cable and pause. (You can see the 9-stitch column on the left needle).
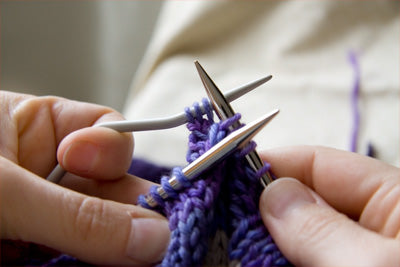
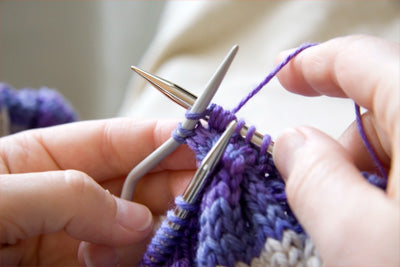
 Slip the next 3 stitches on to a cable needle.
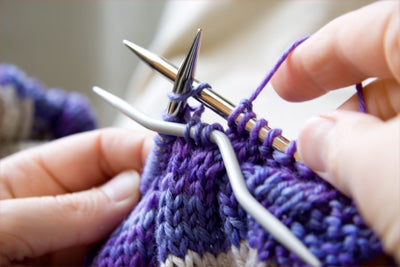
 Let the cable needle hang at the back of your work, and knit 3 stitches from your left needle.
 Now the tricky bit, because you have to manage your 3 needles. Let the left needle hang in front, making sure the stitches don't fall off.
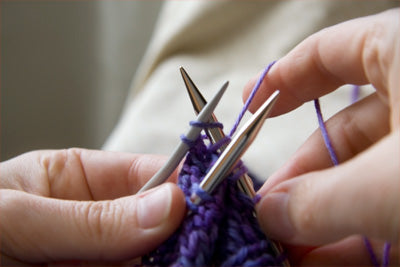 Knit 3 stitches from the cable needle.
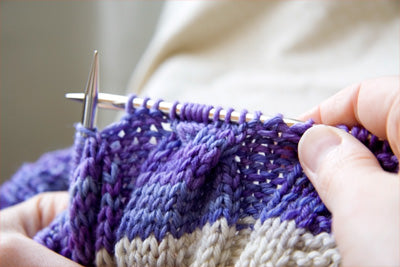
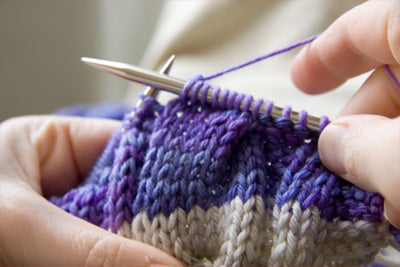 Knit 3 more stitches to the end of the 9-stitch column. There's the first twist of the braid.
 Here's how to work the Cable-6-Front (C6F) on rows 9 and 13. Work up to the cable and knit the first 3 stitches, then slip the next 3 stitches on to a cable needle. Let the cable needle hang at the front. Knit 3 stitches.
 Then knit the 3 stitches from the cable needle. See how Cable-6-Front is almost identical to Cable-6-Back?
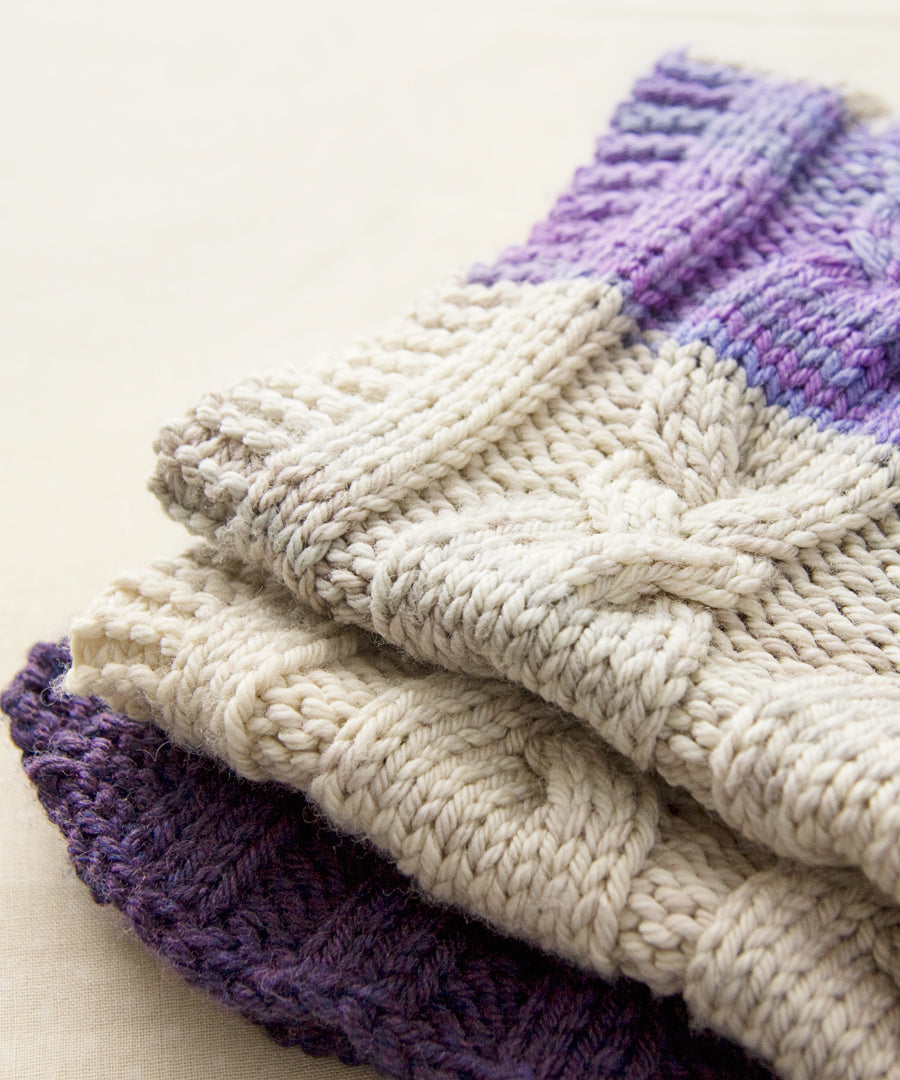
 And there you have the basic component of your braid (it's a lot like braiding hair). You can repeat these close together for a tight braid, or space them out for a looser one, or, as we're doing here, stagger clusters of braids for something even more ornate looking (but actually less work!)
Cables look lovely along the edges of blankets, and really show up nicely in smooth medium-weight yarn. Be careful not to use a really dark yarn that might conceal your cable.